
Please Choose Your Language
close
Choose Your Site
Global
Social Media
Views: 0 Author: Site Editor Publish Time: 2026-06-09 Origin: Site


Establishing reliable electrical connections is the absolute foundation of any successful control system. Component failure at the connection level often leads to sudden system downtime, localized heating, or catastrophic panel failure. Selecting an industrial terminal block requires balancing tight spatial constraints, rising labor costs, heavy vibration resistance, and strict electrical safety compliances. Engineers frequently face challenges when trying to match specific connection types to harsh industrial environments. Choosing the wrong connector directly impacts both daily operations and long-term maintenance cycles.
This guide provides a structured evaluation framework for specifying the exact terminal blocks required for control panel builds, machinery upgrades, or OEM equipment. You will learn how to assess core mechanical designs, evaluate critical electrical specifications, and navigate complex regulatory standards. By following these principles, you can ensure optimal system performance and safety.
The choice of connection technology (screw, spring, push-in) directly dictates long-term maintenance needs and installation speed.
Accurate specification requires evaluating current/voltage ratings alongside wire gauge compatibility and environmental factors (e.g., vibration, temperature).
Modular footprint designs—such as multi-level configurations—are critical for high-density control cabinets.
Regulatory compliance (UL, IEC, CSA) is non-negotiable for commercial control systems and export-ready machinery.
A reliable control system depends on the integrity of its weakest link. For most cabinets, this link is the wiring node. Defining success for a control panel terminal connector means looking beyond basic conductivity. You must evaluate operational reliability under duress. High-vibration environments demand connections resistant to loosening. Accidental disconnections cause expensive factory downtime. You must minimize voltage drop across the terminal. A quality connector maintains consistent contact force throughout its operational lifespan.
Engineers must also weigh lifecycle costs against upfront component costs. Standard screw terminals cost less initially. However, they require time-consuming manual wiring. They also demand regular maintenance cycles for retorquing. Spring or push-in alternatives cost slightly more upfront. Yet, they drastically cut installation time. They also eliminate the need for routine retorquing checks. Over a decade, these maintenance savings easily offset the initial purchase price.
Scalability remains another crucial success factor. Control panels rarely stay static. Facilities expand, and machinery receives upgrades. A successful installation allows technicians to bridge connections easily. It permits capacity additions without a complete rail redesign. Modular systems let you snap in new blocks as needed. They keep the panel organized and adaptable for future requirements.
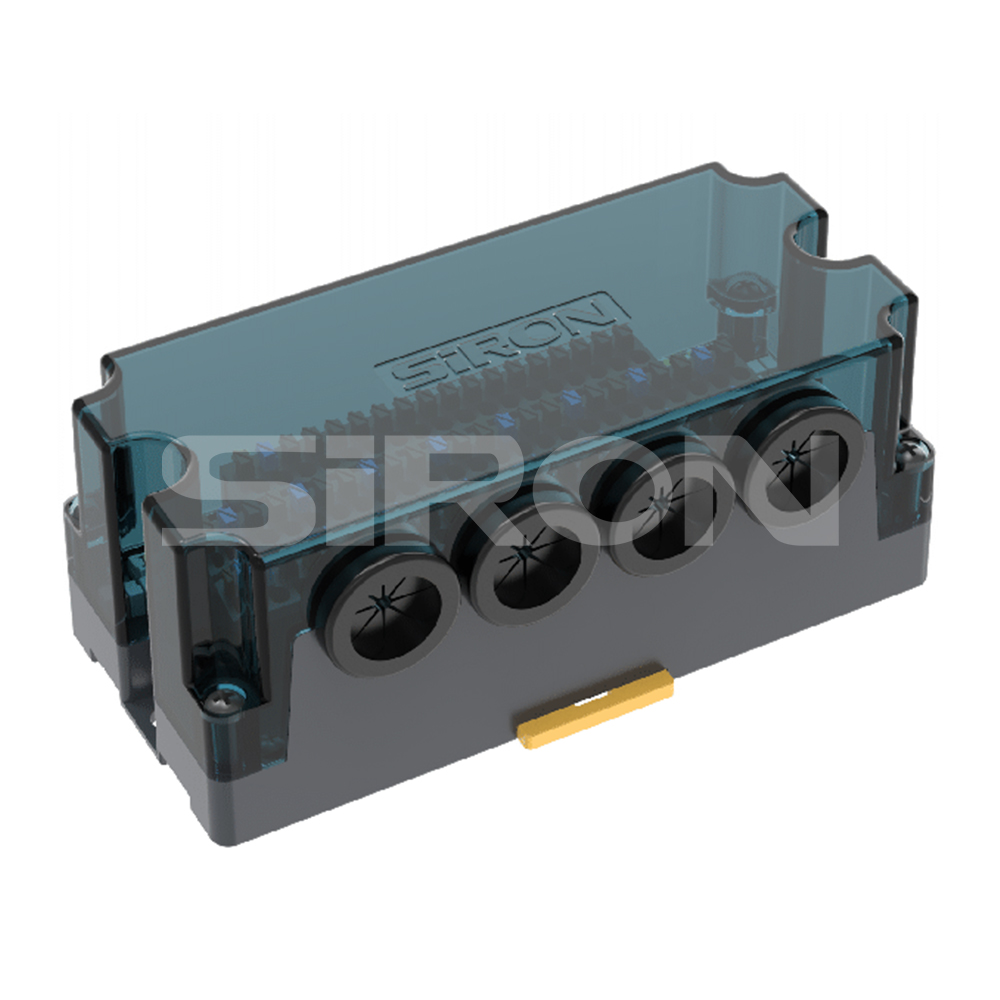
The din rail terminal block serves as the industry baseline for modular control panel layouts. These components snap securely onto standard mounting rails. The 35mm TS35 rail is the most common format globally. They allow for easy expansion. Technicians can slide or snap new blocks next to existing ones. This standardization keeps the cabinet layout clean and logically organized.
Some applications demand frequent maintenance or rapid module replacement. In these scenarios, a pluggable terminal block is ideal. Technicians wire the main harness into a pluggable female connector. They then mate it to a fixed male header on the rail. This prevents wiring errors during fast swap-outs. However, you must accept certain tradeoffs. Pluggable solutions carry a slightly higher upfront cost. They also consume a larger physical footprint compared to standard pass-through blocks.
Cabinet space is incredibly expensive. Multi-level blocks use double or triple-tier designs to maximize available rail space. They stack connections vertically. This approach easily cuts the required rail length in half. However, they carry an implementation risk. Inner-tier wiring becomes harder to reach. Troubleshooting a lower-level connection often requires moving upper-level wires. You should use these primarily for static, high-density sensor wiring.
Modern control panels require more than simple pass-through connections. Function-specific blocks integrate critical components directly onto the rail.
Fused blocks: These provide localized overcurrent protection. They are perfect for isolating sensors and sensitive low-power devices.
Disconnect blocks: These feature a lever or knife switch. They enable rapid circuit isolation for testing without actually removing wires.
Ground (PE) blocks: These establish a direct mechanical and electrical connection to the DIN rail. They eliminate the need to run separate grounding wires back to a central busbar.
Terminal Block Type | Best Application | Primary Tradeoff |
|---|---|---|
Standard DIN Rail | General power and signal distribution | Consumes standard linear space |
Pluggable | Sub-assemblies needing fast swap-outs | Higher cost, larger depth footprint |
Multi-Level | High-density sensor wiring cabinets | Reduced ease of access for testing |
Fused / Disconnect | Localized protection and circuit isolation | Requires specific replacement fuses |
Proper specification starts with electrical parameters. The block's voltage rating must always match or exceed the maximum system voltage. You must carefully observe UL and IEC differences here. Engineers must also verify adequate creepage and clearance distances. Creepage is the shortest path along the insulating surface. Clearance is the shortest distance through the air. Both prevent dangerous electrical arcing.
Current capacity is equally vital. You must evaluate continuous current ratings against potential heat generation. Dense control cabinets trap heat. Always account for thermal derating. If you install blocks in unventilated, densely packed cabinets, their safe current carrying capacity drops. Ignoring derating curves leads to melted plastic and system failures.
Connectors must physically accept your chosen conductors. Check the compatibility ranges carefully. Typical industrial blocks accommodate anything from thin 26 AWG sensor wires up to thick 4/0 AWG power cables. You must also assess the conductor type. Solid wire slides easily into most terminals. Stranded wire is more flexible but frays easily. Assess whether your application requires crimped ferrules. Ferrules bundle stranded wire perfectly, ensuring maximum contact area and preventing stray copper strands from causing shorts.
The mechanical clamping method defines installation speed and long-term reliability. We generally evaluate three core connection technologies:
Screw Clamp: This remains the universal standard. It easily accommodates multiple wires per terminal. However, it is susceptible to vibration loosening over time. It strictly requires a torque specification baseline. Over-tightening strips the thread; under-tightening causes dangerous arcing.
Spring Cage: This technology is inherently vibration-proof. A stainless steel spring maintains constant pressure on the wire. It provides consistent contact force regardless of the operator. It is virtually maintenance-free.
Push-In Technology: This offers the fastest installation. You simply push solid wires or ferruled stranded wires directly into the terminal. No tools are required for insertion. It reduces labor overhead significantly for large panel builds.
Industrial components must survive harsh conditions. Regulatory compliance ensures they do so safely. Navigating global frameworks often confuses newer engineers. The two dominant standards are UL 1059 (Terminal Blocks) and IEC 60947-7-x.
You will often notice a block carries different voltage and current ratings under UL versus IEC. This happens because testing methodologies differ. UL standards generally assume harsher field-wiring conditions. They enforce stricter temperature rise limits under continuous load. IEC standards often assume controlled factory-wiring environments. If your machinery targets the North American market, UL compliance is absolutely non-negotiable. For export-ready machinery bound for Europe, IEC certification is mandatory. Always specify components holding dual certifications to maintain maximum flexibility.
Material safety specifications protect the entire facility. The plastic housing must insulate the contacts safely. Always look for Polyamide (PA) materials. Polyamide offers excellent electrical resistance and physical flexibility. More importantly, verify it carries a UL94 V-0 flammability rating. A V-0 rating guarantees the plastic will self-extinguish within 10 seconds if exposed to an open flame. It prevents localized electrical faults from engulfing the entire cabinet.
Finally, evaluate environmental tolerances. Check the operating temperature ranges. Control panels in steel mills face extreme heat, while outdoor enclosures face freezing conditions. Examine the metal contacts for corrosion resistance. Tinned copper alloy contacts offer superior protection against humidity. Gas-tight connection requirements are also crucial. A gas-tight clamp prevents corrosive airborne chemicals from degrading the copper conductor. This keeps the electrical resistance low over decades of service.
Selecting the right industrial wiring terminal involves more than reading a datasheet. Physical implementation inside the cabinet dictates the true success of a build. You must calculate pitch size to determine cabinet density. Pitch refers to the exact width of the terminal block. Multiply the pitch by your signal count to find the required rail length. Do not forget to account for end-cover requirements. Open-sided blocks require a plastic end plate to insulate the final live connection from the steel rail stopper.
Power distribution requires robust bridging and jumper systems. Planners must evaluate plug-in bridges versus traditional screw-in jumpers. Screw-in jumpers require manual assembly and torquing. Plug-in bridges snap quickly into the center of the block. They distribute power instantly across adjacent terminals. They drastically reduce wiring complexity for common neutral or ground rails.
Complex systems demand clear marking and identification. A panel with 500 unmarked wires is impossible to troubleshoot. Standardized labeling mitigates human error. Ensure your chosen terminal family supports standard marker tags. Center-mounted and side-mounted zack marker strips keep labels highly visible, even when wires obscure the top of the block.
Finally, factor in tooling requirements. Advanced connection technologies require specific accessories. Push-in blocks work best with ferruled wires. This means you must purchase the correct ferrules and precision crimping tools. If you stick with screw terminals, you must supply technicians with calibrated torque screwdrivers. Using standard screwdrivers guarantees inconsistent clamping forces. These hidden tooling requirements impact the actual cost of your wiring strategy.
Moving from a massive vendor catalog to a final bill of materials requires a systematic approach. Follow this shortlisting logic to secure the right components for your build.
Step 1: Define the overarching electrical parameters. Document the absolute maximum system voltage, peak continuous current, and the AWG range of your field cables. Filter out any blocks failing these baselines.
Step 2: Select your connection technology based on vibration conditions and labor cost variables. Choose push-in technology if you build panels at high volume. Choose spring-cage for heavy machinery subject to constant shaking. Stick to screw-clamp for basic, low-cost static enclosures.
Step 3: Determine your spatial constraints. Measure available DIN rail lengths. If space is severely limited, select double or triple-level multi-tier designs. Otherwise, maintain single-level blocks for easier maintenance access.
Step 4: Verify all accessory compatibility. Never assume components mix flawlessly. Ensure you order the exact matching end plates, DIN rail clips, plug-in jumpers, and plastic marker tags designed for your chosen terminal series.
Actionable Advice: Never specify a bulk order based entirely on a PDF datasheet. Always request physical samples from your distributor. Perform a physical fit-test on a scrap piece of DIN rail. Test wire insertion with your actual chosen wire gauges and shop tooling. This physical validation prevents costly delays during the actual production phase.
Specifying terminal connectors requires a calculated balance of mechanical, electrical, and spatial constraints. By defining operational success early, you shift focus away from simple component costs toward long-term system reliability. Evaluating connection types, adhering strictly to UL/IEC derating curves, and planning for physical implementation realities ensures your cabinet performs safely under pressure.
Remember, an industrial terminal block is not just a cheap commodity component. It serves as a critical node in your overall system safety framework. A poorly chosen connection creates immense troubleshooting headaches and safety hazards. Treat your terminal selection process with the same engineering rigor you apply to PLCs and contactors.
If you need assistance matching specific product lines to your cabinet constraints, utilize comprehensive selection tools or consult directly with technical sales engineers. Expert guidance ensures your final bill of materials meets both safety standards and budget requirements.
A: A terminal block is highly modular. It snaps onto a standardized DIN rail, allowing you to add or remove individual connections as needed. A terminal strip (or barrier strip) is a fixed-length component. It comes with a set number of connection points molded into a single plastic block, making expansion impossible without replacing the entire strip.
A: Mechanically, yes. Most brands fit standard 35mm DIN rails. However, mixing brands introduces serious accessory mismatch risks. End plates, jumpers, and marking tags from one manufacturer will rarely align with another. For a safe, cohesive panel, always stick to a single manufacturer's product family on a given rail.
A: Ferrules are technically mandatory for push-in terminals when using stranded wire. The ferrule provides the rigid structure needed to overcome the insertion force. For spring-cage terminals, ferrules are highly recommended to prevent stray strands from causing shorts, but they are not strictly required since a screwdriver opens the spring clamp.
A: UL and IEC testing standards measure safety differently. UL focuses heavily on field wiring variables and enforces stricter temperature rise limits under continuous electrical load. IEC standards are generally geared toward controlled, internal equipment wiring. Consequently, the same physical block often receives a slightly lower, more conservative current rating under UL testing.


